Showing posts with label kids. Show all posts

Tuesday, 3 July 2012

Dolly Quilt Tutorial

I made a New Year's resolution to myself to try and make more birthday presents this year.  I am not doing too badly, which is partly why I haven't managed to blog very much...

For Margot and Kate - both recently 3 years old, I made dolly blankets.

For Margot I crocheted a granny square blanket and made a small patchwork quilt and pillow.
The crochet blanket was a single granny square made really big (12 rounds) and then finished off with a row of double crochet all the way around.  I alternated the colours every two rounds. 

See Pip's blog for how to make a Granny Square.

Then I made this mini patchwork quilt...

To make quilt measuring 13" by 17" you'll need:
20 mixed 3.5" squares
1 piece backing fabric 14" x 18"
1 piece wadding/batting 14" x 18"
Thread, scissors etc

First cut out your squares.  It's easier to cut with a roller if you layer the squares rather than cut single layers of fabric.  The blade works better and it's also quicker.  I used a bought plastic square (er...not sure what the official name for that is) but a piece of stiff cardboard works just as well.

Lay out the pattern however you like it - I find it quite useful to take a picture here so that you can refer back to it as once you start picking up squares to sew together it can get a bit confusing.

A very useful tip from my sewing teacher is to use masking tape or something similar on your machine to keep you straight.  She was showing it to someone making curtains but I have used it permanently since and it has really helped keep me on the straight and narrow.

Take the first and second squares and lay them front side to front side facing and sew with a 1cm seam along one side (so your tape should be 1cm out).  Now open it out and lay the third square on the second square and repeat - you are making a column.  Refer to your photo if you are getting muddled.

Do this for all columns and press seams flat. Usually with quilting seams are pressed to one side but I want this to sit completely flat.  Plus it's doesn't need the extra strength that pressing to one side gives.

Lay two columns together RSF (right sides facing) and making sure all the square joins are as close to matching as possible, sew with a 1cm seam all the way down to the bottom.  Then join the rest of the columns in the same way. 

Press all your seams flat and iron the front side too.  Now trim your backing fabric and your batting to match this size.

The next thing I did for ease (and because it is just a dolls blanket!) is quilt the batting to the patchwork.  Lay the batting on the back of the patchwork and slowly follow the squares either across or down (or both). 

Now lay this patchwork with it's attached batting face down on top of the backing fabric facing up (so RSF).

 Tidy up the edges.

Then sew around all edges with 1cm seam leaving a 10cm gap in one edge.  In this picture I have rolled the quilt to make it easier for me to keep straight (I have a tendency for slightly wonky sewing).

Trim the corners.

Turn out through the hole.

Press the seams on the opening so that you can stitch up that hole as you top stitch all the way around.

Et voila, one satisfied customer!

Wednesday, 18 January 2012

Cute bike seat cover...

My neighbour asked me to make 'girly' a boys bike she was handing down to one of her twin two year old daughters at Christmas...so here is what I did...


First off, I searched the web for tutorials and I found this helpful one here...I started out using this and then kind of ended up doing my own thing as my needs were slightly different. It was being used by a child so would need to be tight and secure but also easily removable for washing.


I followed the blog instructions for cutting the fabric. I won't copy them all out here as it is someone else's tutorial.


I then quilted mine with some wadding to make it slightly more comfy and also stronger and more secure.


Then I put the right sides together and machined around the edges...as per instructions. As you can see in the picture below I hadn't allowed quite enough fabric for the sides because I ended up making the cover slightly bigger than my initial drawing.


So I pulled the sides together, folding the end underneath and I tightly hand sewed right up to the pole. The seat cover can still come off the other way.


I then sewed pink bias tape all around the remaining opening, joining the two ends of the tape at the pole with a bow. I thought trying the fancy way of joining the ends of bias tape in that tight spot might be a bit of a faff. I  then added ties at the top. To undo the seat cover you untie the top bow, unfold the flap and slip the seat out.


I also covered the protective padding around the handlebar. I just made a tube out of the spotty fabric and slipped it in.

Lovely!

Tuesday, 17 January 2012

A pirate's life for me...

My baby boy (3 last Sunday - sob sob) is very much into pirates at the moment. Partly because that's what all 3 year old boys tend to like but mainly because he loves a new Disney kids program called 'Jake and the Neverland Pirates' which we get on Sky. I wanted to make him a 'Jake' costume as part of his Christmas present.
BTW: If anyone who reads this blog has a child who loves that show I can highly recommend the soundtrack CD. I picked it up just before Christmas on Amazon for about £3.50 and it's great. The pirate rock is actually quite catchy for a kids CD. We have all been singing and dancing to it...anyway, I digress...The dressing up clothes...
I decided to make Zac a pirate costume just like Jake's and so here is what I did...
First I looked at this site that my friend Jess, in New Zealand, sent to me because they did a fair bit of boy craft. Dana actually has a whole section on boys that I will definitely be looking over again. Anyway, she had a pirate vest tutorial which looked really cool but as I was running a bit short on time, I decided to wing it and made the whole thing up.
I chose some fabric that wouldn't fray so that I wouldn't need to hem it and some gold edging/tape/ribbon type stuff from a local craft shop.
So for the vest I took a one that I had made previously for a cowboy costume and chalked and then cut around it. The way I originally made the cowboy vest was by taking a T shirt that came up on the big side and with chalk drawing the shape of it without sleeves onto the felt and then cutting that out twice. One for the back, one for the front. Cut up the centre of the front piece to make the opening and shape the neck. For Jake's I left the lapel flaps in place as that's kind of how his looks. Sew the sides an the shoulders together...hey presto!
If you want to make one out of fabric that would need hemming you should follow the tutorial from Dana's website here.
So next I used a zig zag stitch and some yellow cotton to sew the glittery edging tape on. It frays so I had to sew the ends under themselves. I also didn't quite buy enough so it only got sewn on the front. I found some old buttons and sewed them on and that was the vest done.
I then made a red headband like Jake's one by sewing a long inside out sausage which tapered at each end. Next I turned it the right way out and closed the gap with the machine. That's the great thing about dressing up clothes. It  doesn't really matter too much about the finishing. I also wanted to re-create Jake's T-shirt with leather ties so I took an old long-sleeved white vest of Zac's and cut the neck off and then made a cut vertically. I then bound this with brown bias tape and made some holes which I threaded the brown cord through...See pic above if you don't get what I mean. This didn't really work as well as I had hoped as the T-shirt material was very stretchy cotton jersey. The neck opening ended up bigger than it should have but again, it doesn't really matter. It actually made it easier for a 3 year old to get on himself.
I got the belt 'buckle' from the craft shop and I stitched it on to a piece of brown felt that can be threaded through any jeans as my son had been known to get through more than one pair in a day!
I didn't get a picture of him wearing this creation on Christmas Day as it was slightly busy! However, since then we have been to the panto and watched Peter Pan with Hook and his gang and so now we have added to the pirate dressing up collection.
The pirate hats were from here but I used Dylon fabric paint rather than cut out and sew on the jolly roger...
The map, I hand drew with a sharpie onto fabric after searching the web for 'pirate map' and coming up with this one in Google images. I was quite pleased with this and it was really quick...Ed says I missed my calling as a pirate cartographer...:)
The hook is obviously a plastic coat hanger which I cut with a hack saw and taped up so that Zac could stick it up his sleeve. The fishing line, dowling with a nick out of it to stop the line from slipping, string and a small bit of wire shaped for the fishing hook.
The flag and eye patch were actually a real pain but mainly because I didn't have any black felt in my stash. Every other colour but no black. So as I was making this at 10pm the night before his 3rd Birthday party I had to improvise. I found an old top and cut it up. I used interfacing to stiffen the fabric and I sewed it inside out and then turned it the right way out.
I drew the two skull and crossbones after searching for a suitable image online and copying it. I used this Dylon fabric paint which worked well.

Cakes for Zac's party...a bit last minute as I had planned to buy some pirate flags and cases to save some time but I went to get them and the shop had run out so I made them instead. If you want to make cupcake flags, to save you some time, the perfect sized flags are approximately 3.5cm x 2.5cm. You should get four in a row on A4 paper. Cut them out in pairs, wrap them around the stick with glue. I then coloured in the white line which divides the two sides of the flag with a black marker. I would have attached a PDF of my pirate flag sheet but haven't worked out how to do that on my blog yet...

One happy pirate with his Uncle Phil X

Tuesday, 16 August 2011

Story stones from Red Bird Crafts...

I finally got to make some decorated stones with Gabe today...it was great fun. Makes a nice change from colouring and stickers and less messy than painting (honestly!). I did the cutting, he did the gluing and placed some of the fabric, he also decided what we were making. I think little girls could especially get into this!
The site that the idea and the instructions came from is here but you don't have to use Mod Podge (it's not widely available in the UK so will end up costing you around £10). I just used watered down PVA. I will need to put another layer on once this layer has dried as some of my fabrics were quite thick...a good idea to soak thicker fabrics in the glue mix if you can, or at least paint some glue on the back of the fabric, as well as the front and on the stone.

Happy rainy August days! Nix! 

Thursday, 11 August 2011

Pinterest - ideas central - be warned - highly addictive!

As if I needed any more things to add to my must do/try/make list/board/book!!
This site is the place to just stick up pictures (and links) of the things you like...and you don't have to look far for those because loads of people who like art, craft, interiors, fashion, inspirational words, beauty, kids and food are already pinning what they like. It is also full of loads of links to interesting blogs...
Here are a few links that made me think of my friends...
Nici - I'm sure you already know how (as you own the tools) but when I saw this tutorial I remembered you saying how you wanted to do this...now I want to do it with you...
Wendy and Rhian - This made me think of you both. Rhian - I heard you are doing some lovely patchwork bags and Wendy - we both admired Jenny's cushion - not sure if you managed to create one yet.
Alex - Some beautiful bridal and kids shots on here, always worth a peek at what other people are doing when you are in that line...plus...get some of your gorgeous work up there.
Jenny and Anna - Interior inspiration...cancel your subscriptions...this place has it all...such lovely and interesting home ideas.
Nix

Monday, 1 August 2011

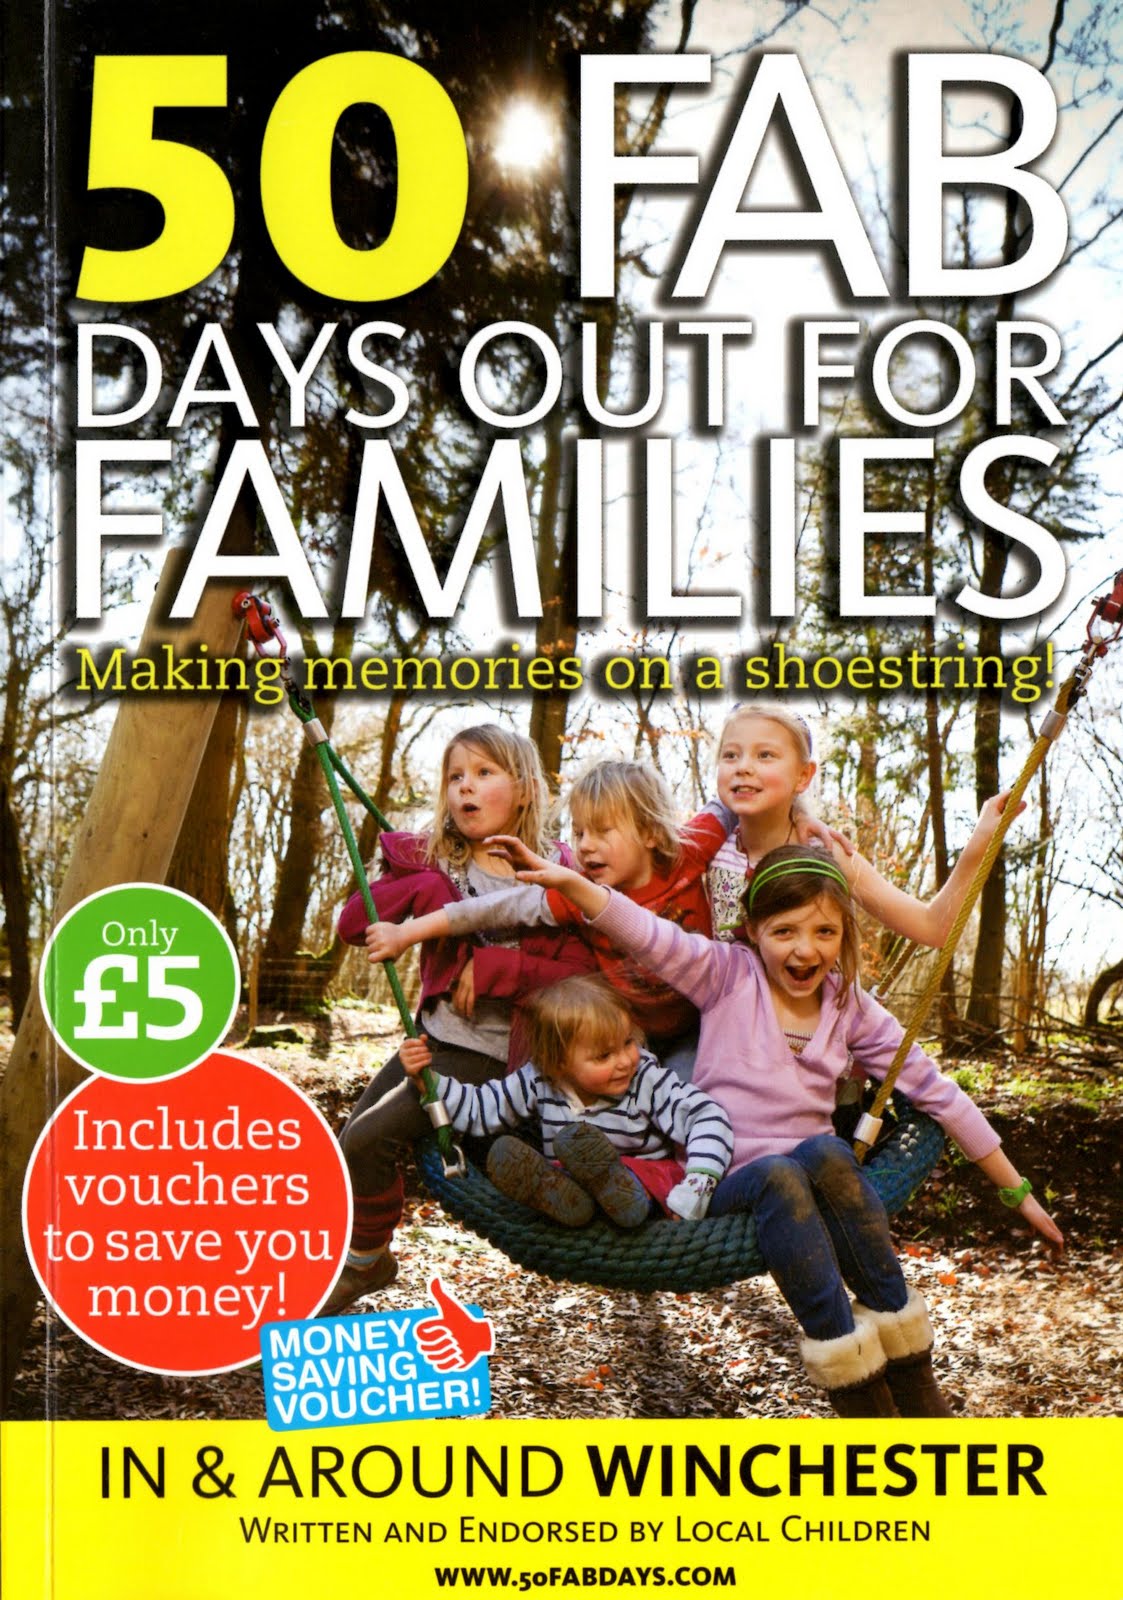
50 Fab Days Out for Families - Winchester Area

 
The Mum's at a local primary school, Compton All Saints, got together to create this brilliant book. A must have handbook for school holidays all year round but especially the summer ...which has arrived at last!!! Woo hoo!
You can get hold of a copy for £5 here...50fabdays.com

It's full of days out and also shorter trips that the children will love, all them inexpensive or free. Most are outdoors and they include beach days out, new forest adventures, paddling spots, best bike rides for children. It's great if, like me, you didn't grow up in the area and don't have the benefit of local knowledge.
It's really well laid out with sections for parents tips and kids tips. It also helpfully reminds you what not to forget, e.g. swimming stuff / wellies for paddling. Lastly, all profits from the book go to the school.

Thanks, Nix!